How to Paste Excel Table into Word in Landscape (3 Easy Ways)

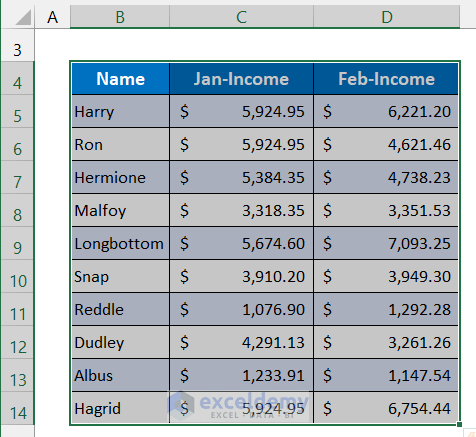
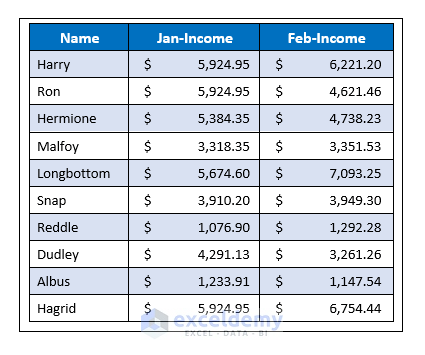
In this article, we will demonstrate 3 distinct methods to paste an Excel table into a Word file in Landscape orientation. We’ll use the dataset below of 10 employees and their income for the first two months of a year. Our Excel table is in the range B5:D14. Let’s copy and paste this table into a Word document.
Method 1 – Paste Excel Table as a Picture
- Back in Excel, select the entire range of cells B4:D14.
- Press ‘Ctrl+C’ to copy the table onto the clipboard.
- Go back to the Word document.
- From the Insert tab, select Table > Excel Spreadsheet.
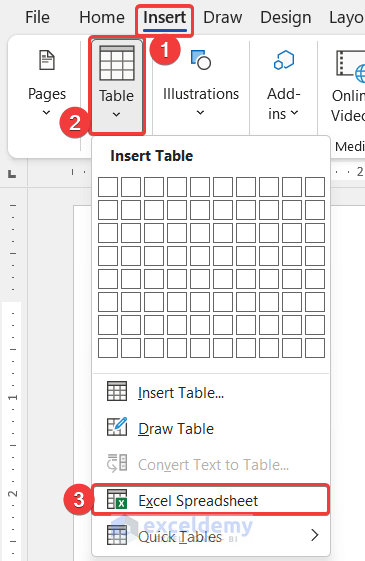
An Excel spreadsheet will appear in Microsoft Word.
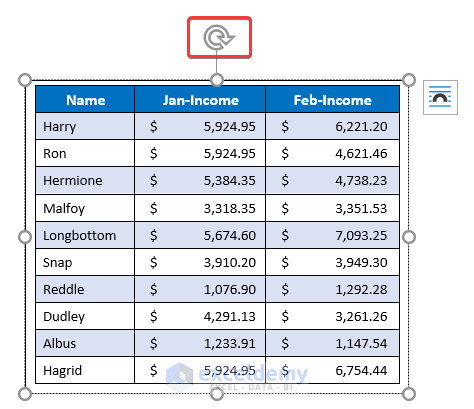
- Select the drop-down arrow of the Paste option and choose the Picture option.

- Click the Arrow icon with your mouse to get the complete table in view.
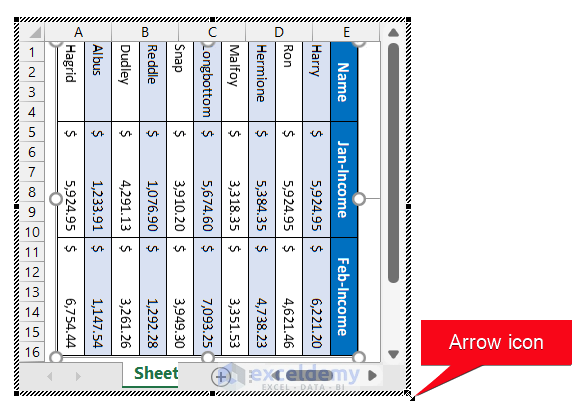
- Click your mouse cursor on any empty space on the Word page.
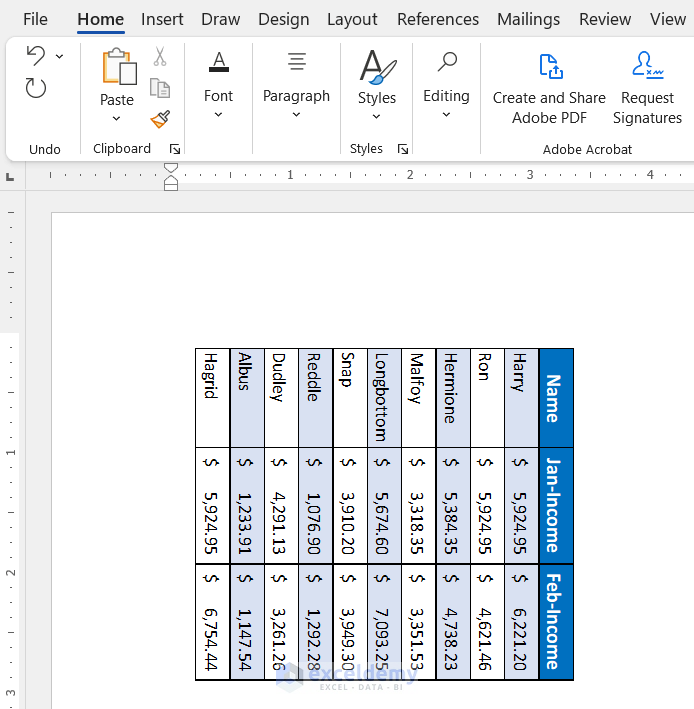
The table is placed on that page in the landscape format.
Method 2 – Insert Through Text Box
We can alternatively insert a text box into which to paste our Excel table into a Word file in landscape format.
Steps:
- Select the entire range of cells B4:D14.
- Press ‘Ctrl+C’ to copy the dataset.
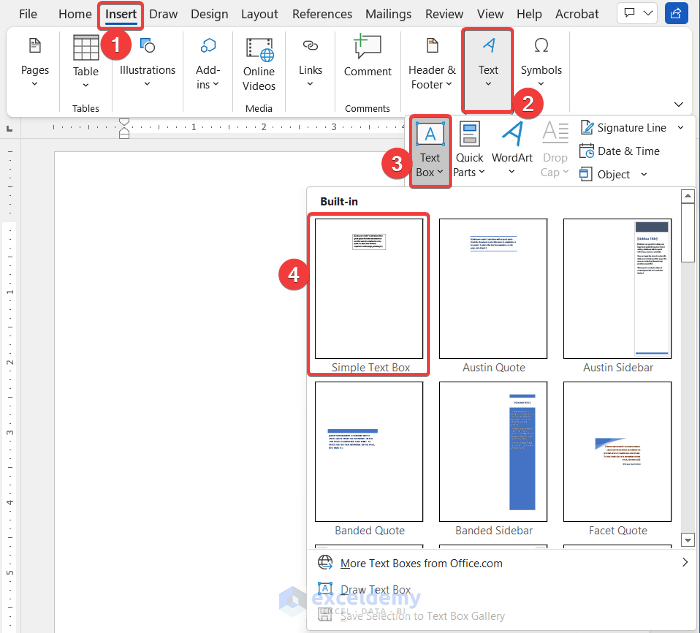
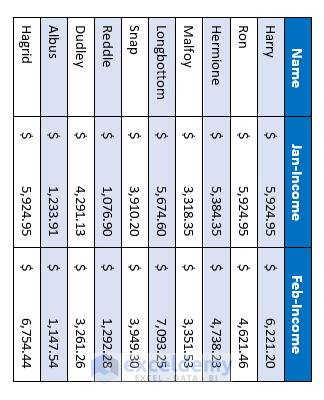
- From the Insert tab, select Text Box > Simple Text Box from the Text group.
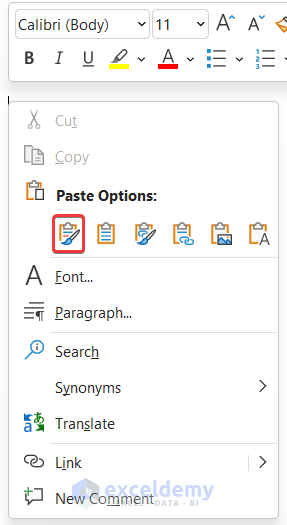
- Right-click on your mouse, and in the Paste option, choose Keep Source Formatting(K) to paste the dataset into the text box.
- Do some formatting to get better visualization.
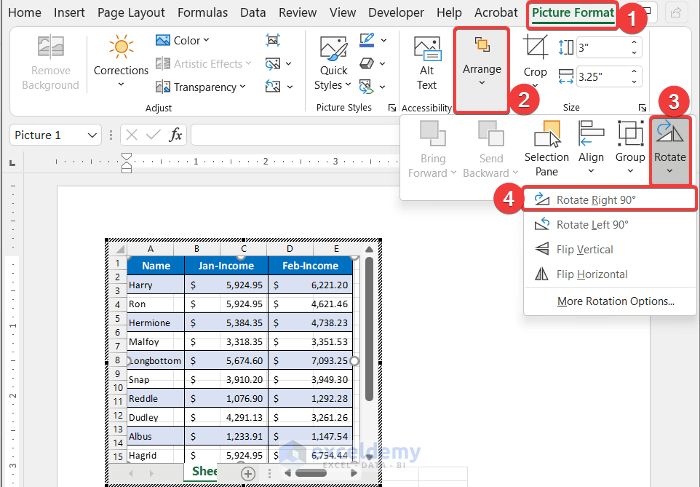
- In the Shape Format tab, select Rotate > Rotate Right 90° from the Arrange group.

- Alternatively, use the Rotation Arrow above the text box to rotate the text box manually.
The table is inserted in landscape format.
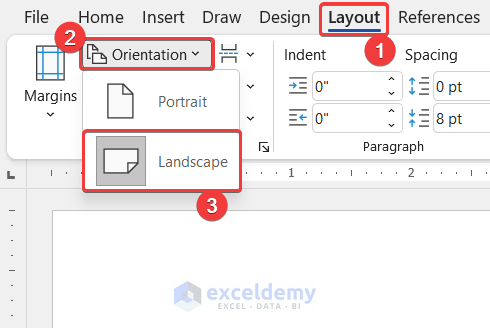
Method 3 – Changing Page Orientation
This is the easiest way to paste an Excel table into Word in landscape format.
Steps:
- Select the entire range of cells B4:D14.
- Press ‘Ctrl+C’ to copy the table.
- Right-click on your mouse and in the Paste option, choose Keep Source Formatting (K) to paste the table.
- Or, press K on your keyboard to paste the table with the source formatting.
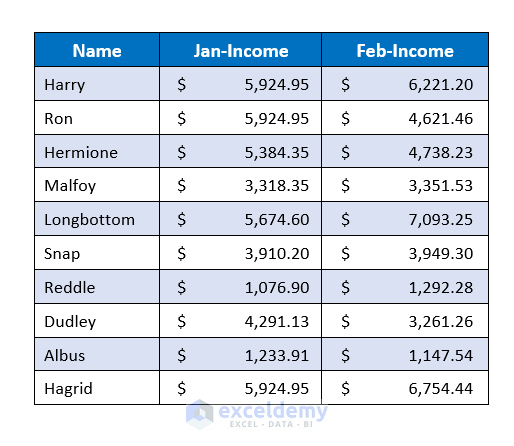
- In the Layout tab, click the Orientation option from the Page Setup group.
- Change the Orientation from Portrait to Landscape.
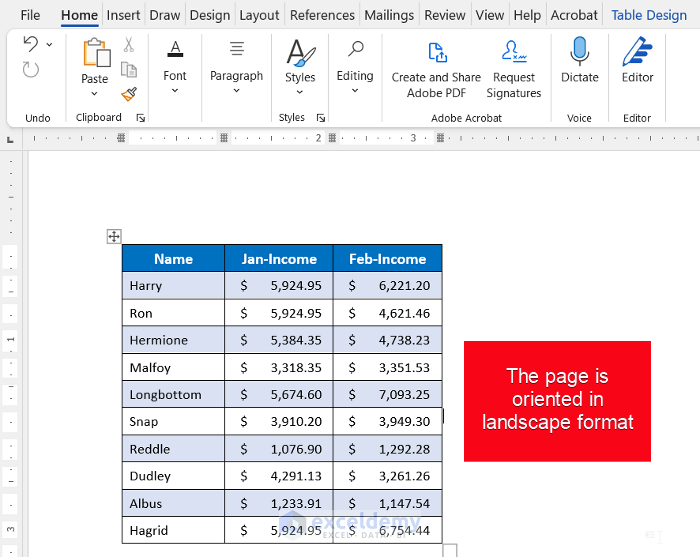
The page layout changes and the table is included on that page.
Download Practice Workbook
