
If your laundry room needs some rearranging, you can stack your Samsung Bespoke washing machine and dryer using the Bespoke Stacking and MultiControl Combo Kit. It’ll let you securely place your dryer on top of your washing machine and provide extra space for loading and removing clothing. You can also use the standard Stacking and MultiControl Kit with your standard Samsung washing machine and dryer.
After purchasing your Bespoke Stacking and MultiControl Combo Kit, you can refer to our video for installation instructions. Or, use our step-by-step instructions below. Keep in mind that two people are required to lift the dryer onto the washing machine.
Provided stacking kit components
When installing the Stacking and MultiControl Kit, make sure to use a kit that is compatible with your Samsung washing machine and dryer. Two people are required to lift the dryer onto the washing machine. Additionally, do not lay the dryer down on the floor when installing the stacking kit, as doing this may scratch the dryer.
You can use the following steps to install your Stacking and MultiControl Kit, or refer to our video.
Provided stacking kit components
Set the clock automatically Note: This function only works when the TV is connected to the internet or with an antenna. If you don't want to bother with setting the time, just make the TV set it for you. Using the remote, navigate to and select Menu, then select Settings (All Settings), and then select General (General & Privacy). Select System Man
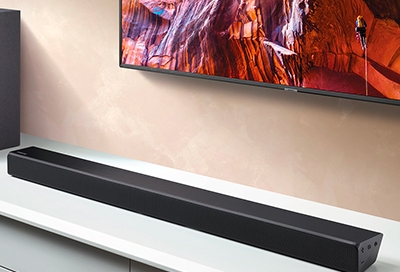
Connect your soundbar using Wi-Fi There are multiple benefits to connecting your soundbar to your TV via a Wi-Fi network. For instance, this way gives you a wider range to connect compared to Bluetooth. It also allows for multiple connections, as long as they are on the same network. Before you begin this process, make sure that you have the SmartT
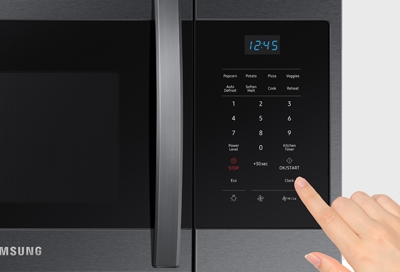
First, Check Your User Manual The most accurate instructions tailored to your microwave model are in the user manual. If you've misplaced the original manual or received an abbreviated version, don't worry. A full digital copy can be easily downloaded from our support center at any time. Set the time with arrow buttons (MG11T5018CC) You should set
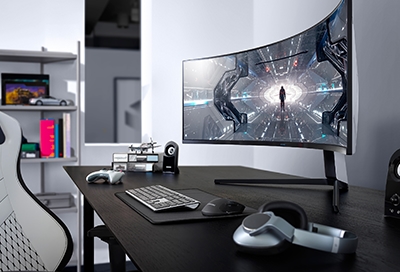
Selecting the right cable The cable choice significantly impacts monitor performance, especially concerning maximum refresh rates. Refer to the user manual to determine whether HDMI or DisplayPort is required for full performance. Generally, using the latest version of the cable directly connecting your devices—minimizing adapters—ensures the best